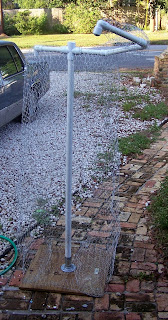
So I was looking at pictures of cemeteries/tombstones and I stumbled across this one...
I instantly said "wow how can I make this?" I remembered a few weeks/months ago (not sure which) reading this tutorial. So I think I've just added this one to my project list :) I believe I can do this one fairly quickly...like maybe in a morning... so I'll post pictures when it's finished :)
Saturday, June 15, 2013
Tuesday, June 11, 2013
It's Alive!!!!!!
So it's been 578 days or 1 year and 7
months or 82 weeks and 4 days or about 832,320 minutes or about
49,939,200 seconds since I last posted a blog. A lot has happened
since then. Let's see, where to start... well we moved for one
thing...not far mind you but a move is a move and they're all pretty
terrible... with that my yard haunt “Empty Grave Acres” saw it's
last Halloween last year... But fear not, this year is a new year and
I have a much bigger yard so we'll see what comes about... Also, I
now have 2 teenagers enjoying themselves while navigating the
treacherous waters of high school and a middle schooler who...well,
let's just say he's maneuvering just fine so far... I've been
promoted twice since my last post and I believe my wife changed jobs
(same job different hospital) but I'm not sure that fits the
timeline... Oh, and I finally got to meet the Mitchell's from
How to Haunt Your House. (Which if you all remember was one of my main reasons for moving
here...lol)
I've decided that I'm going to change
this blog from being only focused on my yard haunt to also include
just general weirdness that I like... so I hope that you don't
mind.... I figure this way I'll probably post a lot more often...
But for now I'll talk about my yard :)
I am renaming the haunt since we are no longer at the same location
but I have yet to decide on what I will call it... And I need to work
on a back story but what I have decided is that I will focus mostly
this year on new tombstones and a Mausoleum... I figure with the way
that I procrastinate I should be able to at the very least pull that
off... I will recycle the stones I've been using, maybe retouch them
(because a few are several years old) and then hopefully add 10 –
15 more...maybe even get a few statues in the mix, but doubtful... I
am getting the halloween itch so who knows what I'll do between now
and then... anyhow...I'm back and I'll be posting more often now :)
Friday, November 11, 2011
My Breathing Grave
This year I built a breathing grave. It was a huge hit on Halloween. the moment is very subtle, depending on when you looked at it you knew something was odd, and then you really saw the "breathing" movement. Here's a daytime video:
I'm not sure if I have a night time video, but I will lokk and see if I do...
Happy Haunting!!!!
~Bill
Thursday, November 10, 2011
2011 pictures...
So now that Halloween has past this year, I figured i should post the few pictures that I have from the "big" night...
I've already started planning next year. We doubled the number of ToT's this year. It's a lot like it was in Salt Lake City... each year seems to grow as people find us.. I hope you enjoy the pics, and that your Halloween was amazing:)
Happy Haunting!!!
~ Bill
Jen's new Spider victim
the kids & me
Jen & I
Happy Haunting!!!
~ Bill
Sunday, October 9, 2011
Here's the work in progress...
22 days!?!?!? I can't believe that we're down to 22 day's already!!!! So last night my lovely wife Jen was outside taking some pictures of the yard. I have been adding the finishing touches to my reaper statue... added some spanish moss and changed the lantern mostly.
I hacked the wal-mart hurricane lantern so that it actually has a flicker candle in it, and I "aged" the glass globe. I haven't put the fog machines out or anything like that yet.
Here's two of the pictures that she took last night:
I hacked the wal-mart hurricane lantern so that it actually has a flicker candle in it, and I "aged" the glass globe. I haven't put the fog machines out or anything like that yet.
Here's two of the pictures that she took last night:
So this coming weekend, I have two projects to build/complete and some fine tuning of the lighting etc. At Viv's suggestion, I am going to make a gibbet and hang it and my Wal-greens corpse from a tree. And I almost have all the parts for my breathing grave. so I still have a ton to do :)
I hope everyone is having an awesome October, and I'll keep you posted on my progress!!
~ Happy Haunting!!!
Bill
Wednesday, September 28, 2011
So with only 33 days …
Until Halloween, I have started another prop. Well, actually I started it this past weekend. One of the things I've always liked that other home haunts have (or have variations of) is the Monster Mud reapers. Before I had discovered the haunts that have became my inspiration and idols (of sorts) I had seen a picture of something called "the Watchman". It was a hooded figure holding a lantern much in the style of the Pleurant (Weeper) statues. (For a great blog post on these go to this post. I just recently started following Midnight in the Garden of Evil's blog, and I think all of you should as well J ) I believe I first saw it around 2007 or 2008. In fact I saved the pictures to my computer and told Jen that one day I would build one of my own. So finally I did …
First, I apologize for the poor quality of the picture. (I am the first to admit that I suck at taking pictures.) I haven't completely finished him yet. I still need to slap another coat of Monster mud on him, then do some painting/highlighting, and accessorize him.
Here's some of the build pictures …
The frame was made from PVC and "chicken-wire".
This is with the main body covered and MM'd. I tried to stay out of the picture but Kate decided to force me to be in it…lol
Here I am fitting the hood before MM-ing it.
Well, back to workJ
Happy Haunting!!!!
~Bill
First, I apologize for the poor quality of the picture. (I am the first to admit that I suck at taking pictures.) I haven't completely finished him yet. I still need to slap another coat of Monster mud on him, then do some painting/highlighting, and accessorize him.
Here's some of the build pictures …
The frame was made from PVC and "chicken-wire".
This is with the main body covered and MM'd. I tried to stay out of the picture but Kate decided to force me to be in it…lol
Here I am fitting the hood before MM-ing it.
And here it is at night....
So this is my project for this week. I hope to have him completely finished by Thursday; Friday by the latest. Weather permitting I also plan on setting up the yard this week. After this I am hoping to make a "breathing grave" and maybe a FCG (Flying Crank Ghost). I purchased a few motors so those projects will hopefully not take long. Well, back to workJ
Happy Haunting!!!!
~Bill
Tuesday, September 20, 2011
A new prop...
has been made. So finally I made a new prop. This year has been extremely trying on me in regards to life just not wanting to co-operate with my plans. So finally in the middle of September I made a new prop. As I've stated before, I tend not to go towards the gore but I've wanted to do this one for a while now. So here's the story:
Last Friday while taking Viv to school, we (Jen, Viv, and I) snuck off to waffle house for breakfast. Then after we had to stop by Wal-greens. Well, I found 2 of these guys hanging out:
So it's a "life-size" at 5 ft. (yes it is bigger than Kate) and it only cost me $30 a piece. I bought the only two that they had. Over on the Halloween Forum they posted a thread on these guys and someone shared a link to this guy's tutorial on using plastic to corpse a skeleton . So I decided to give it a try. Like this guy I am way too lazy for the method that uses liquid latex and cotton...lol...
So here it starts:
So I started with wrapping the body, arms and legs with the .7 mil plastic drop cloth. then I used the brand new heat gun I purchased just for this occaision and started to form it to the skeleton.
Then I painted it with Walnut colored stain. I used Minnwax Gel stain just like the tutorial said (except he used Hickory). Then I dry brushed it with some tan paint, just to bring out the highlights. Next I worked on the neck and head.
I added some hair, and my corpse is hanging out drying upstairs with the kids. I may do a few more details and touch ups but I am not sure what they might be at this time... maybe some decayed clothes or something, but who knows.
Prior to corpsing this one, Kate got to pose with him...
Yes, in case you were wondering, he is dressed as Gavin. In fact, Gavin wanted to send him to school tomorrow instead of him having to go...lol
So there's my first prop of the season...Hope you all like it!!!
Happy Haunting!!!!
~Bill
Last Friday while taking Viv to school, we (Jen, Viv, and I) snuck off to waffle house for breakfast. Then after we had to stop by Wal-greens. Well, I found 2 of these guys hanging out:
So here it starts:
So I started with wrapping the body, arms and legs with the .7 mil plastic drop cloth. then I used the brand new heat gun I purchased just for this occaision and started to form it to the skeleton.
Then I painted it with Walnut colored stain. I used Minnwax Gel stain just like the tutorial said (except he used Hickory). Then I dry brushed it with some tan paint, just to bring out the highlights. Next I worked on the neck and head.
I added some hair, and my corpse is hanging out drying upstairs with the kids. I may do a few more details and touch ups but I am not sure what they might be at this time... maybe some decayed clothes or something, but who knows.
Prior to corpsing this one, Kate got to pose with him...
Yes, in case you were wondering, he is dressed as Gavin. In fact, Gavin wanted to send him to school tomorrow instead of him having to go...lol
So there's my first prop of the season...Hope you all like it!!!
Happy Haunting!!!!
~Bill
Subscribe to:
Posts (Atom)